Tuesday, April 28, 2009

Peppermint Patties - Homemade

Photobucket

So, I was feeling like I needed some time in the kitchen today....just the two of us. We're best friends, you know? I went to my shelf and picked out a book that I haven't used yet. Sweet Temptation by Nicki Trench. To be honest with you, I was a little disappointed after getting this book. I'm not a fan of fondant, never have been. This book uses a LOT of fondant....therefore has a LOT of recipes I'll never use. None-the-less, I have the book and wanted to use it.

I decided to make the Peppermint Patties....called Peppermint Creams in the book.

The recipe is very simple, 4 ingredients (and actually only 3 of them are necessary) total and voila!

You start with powdered sugar and a lightly beaten egg white (it should be a little frothy-looking). It'll be runny at first:
Photobucket

Then, as you add more powdered sugar, it'll become more thick....so thick and chunky and dry-looking that you won't be able to stir it with a fork any longer:
Photobucket

After this point, you can add in the peppermint extract (or you could be really daring and use another kind of extract) and the food coloring (optional). You'll need to start working the dough with your hands until you get a nice "doughy" ball that is evenly colored (if you used dye) and smooth:
Photobucket

Now, this is where I deviated in a big way from the recipe (other than the fact that I never measured the powdered sugar. *smile*

The recipe says to roll the dough out and cut the circles with cookie cutters. I thought that I'd end up wasting a lot of the 'dough' that way, since the dough will dry out quite quickly, I probably wouldn't be able to reuse the scraps after cutting the first set. So, to alleviate this problem, I just pulled off little bits of the dough and rolled them into balls.
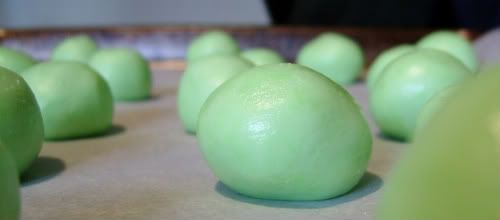
Photobucket

I used a small glass cup and dipped it into some powdered sugar and then flattened the balls. Yes, the edges will be cracked (but I didn't care), unless you flatten the balls as you go. Then they wouldn't have time to dry slightly on the edges and would be easier to flatten without cracking.

Photobucket

Now, you can stop here and end up with something similar to those "after-dinner mints" that come in those pastel colors...but I wanted chocolate! So, we decided to dip half of them into some semisweet chocolate. Which, I think, made them look pretty anyway.....and of course everything tastes better with chocolate.
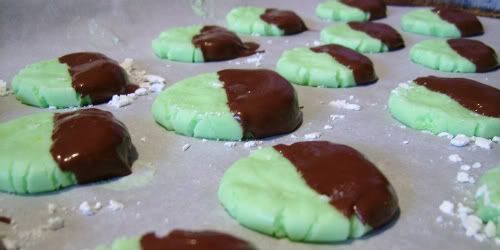
Photobucket

We were able to get 26 little mints out of one batch. The recipe never says how many they 'suggest' you'll get out of it.

Here is their recipe:

1 3/4 C powdered sugar
1 free-range egg white
peppermint extract
food coloring (optional)

1. Lightly grease a large piece of waxed paper. Sift approximately two-thirds of the sugar into a mixing bowl. Lightly whisk the egg white with a fork until it is lightly frothy. Pour the beaten egg white into the icing sugar, add a few drops of peppermint extract, and mix with a fork until all the ingredients are combined.

2. Add the remaining sugar a little at a time and continue mixing until the dough is too stiff to mix with a fork. Finish mixing with your hands until the mixture has a doughy consistency. Taste and add more peppermint, if necessary. Keep your hands dusted with sugar so that the mixture doesn't stick to your fingers. Add a few drops of food coloring if desired.

3. Dust your work surface with powdered sugar and roll out the dough to a thickness of 1/2 inch. With a small round cutter, cut out the peppermint creams and lay them on the sheet of waxed paper to dry.


Enjoy!
-Erica

Monday, April 27, 2009

VOTE! (Maybe you'll get a prize)

Alright everyone! The IronCupcake: Earth April Challenge is ON! Voting is open!!!

I have entered 4 delicious cuppies for this month's challenge.

SODA POP!

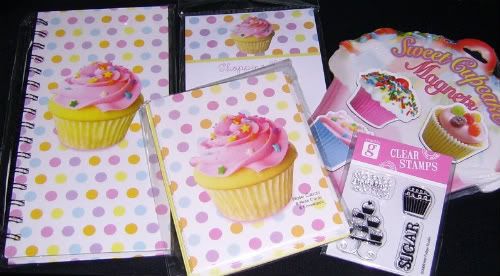
Wanna win something wonderful just for voting (and not necessarily for me)?! Well, I thought you might! The winner of this giveaway will get some SUPER cute cupcake goodies, including stamps, magnets, notepad, and more!

CUPPIE PRIZE PACK:
Photobucket

Here's how:
Go to IronCupcake Headquarters and vote for your favorite THREE cuppies! Post back here and let me know you voted! You get an entry!

Now, if you happen to vote for ME (any of the four I entered) you can post AGAIN and say that you voted for ME....you'll get another entry!

If you subscribe to my blog, guess what?! You'll get another entry! (If you're already subscribed, just post and say so)

IronCupcake voting is open until May 4th, Noon (central time) - so this contest will be open until then also!!! GO VOTE! :)

The four cuppies I entered are:

Orange Dreamsicle
Photobucket

Root Beer Float
Photobucket

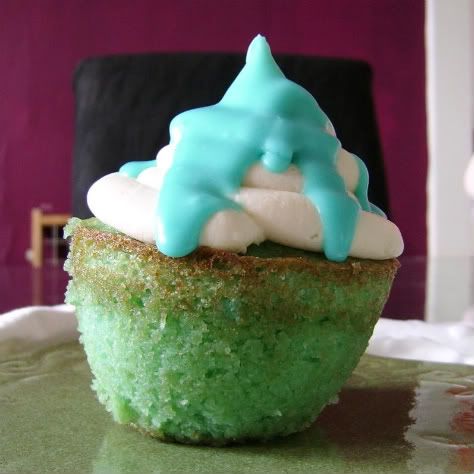
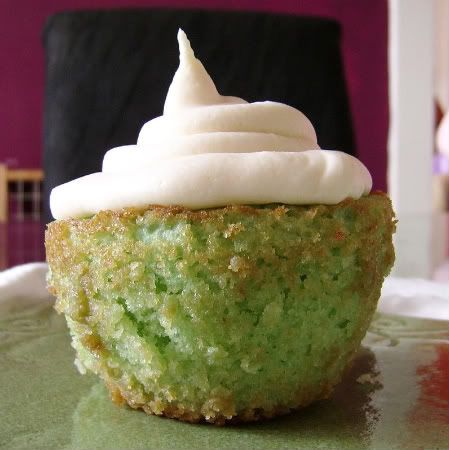
Blue Bubblegum
Photobucket

Berry Lemonade
Photobucket

Enjoy!
-Erica

Chocolate Almond Kahlua Cheesecake

It is that time again, my friends! The Daring Bakers have been busy in April........creating CHEESECAKE! Cheesecake of all kinds, sweet and savory. Glorious cheesecake. I was excited! I love cheesecake!

Me? I went for something different than I've ever made before....and it was yummy!

The April 2009 challenge is hosted by Jenny from Jenny Bakes. She has chosen Abbey's Infamous Cheesecake as the challenge.

So, we pretty much had tons of freedom on this challenge. We could add flavors, change crust, etc. Which was fun....and interesting. To see what the other Daring Bakers came up with (and there are some truly phenominal creations), go here.

So, I started with the basic recipe and added 1/4 C of cocoa powder. For the vanilla, I substituted almond extract and for the liquer, I used French Vanilla Kahlua. YUMMY!

Once I had the crust ready, I sprinkled white chocolate chips over it. Then covered it with the cheesecake mixture.

Photobucket

Once it was set and ready....I covered it with a chocolate almond ganache. So delightful, really. Then, for just one more OOMPH! I sprinkled more white chocolate chips on top of the ganache (before it had set, of course).

Photobucket

This recipe is fantastic! The cheesecake is creamy....sets perfectly....and did you notice....NO CRACKS! I have been using a "water-bath-like" method for a long time to prevent cracks in my cheesecakes. I did it the same way this time.....just put a pan of hot water on the shelf below my cheesecake....BUT I put the pan of water in as soon as I turn the oven on for pre-heat. That way it gets the oven ready for my cheesecake. I find this to be a great method.

One last beautiful shot:
Photobucket

Here is the recipe we used (you should try it and get creative on your own!)

Abbey's Infamous Cheesecake

crust:
2 cups / 180 g graham cracker crumbs
1 stick / 4 oz butter, melted
2 tbsp. / 24 g sugar
1 tsp. vanilla extract

cheesecake:
3 sticks of cream cheese, 8 oz each (total of 24 oz) room temperature
1 cup / 210 g sugar
3 large eggs
1 cup / 8 oz heavy cream
1 tbsp. lemon juice
1 tbsp. vanilla extract (or the innards of a vanilla bean)
1 tbsp liqueur, optional, but choose what will work well with your cheesecake

DIRECTIONS:
1. Preheat oven to 350 degrees F (Gas Mark 4 = 180C = Moderate heat). Begin to boil a large pot of water for the water bath.

2. Mix together the crust ingredients and press into your preferred pan. You can press the crust just into the bottom, or up the sides of the pan too - baker's choice. Set crust aside.

3. Combine cream cheese and sugar in the bowl of a stand-mixer (or in a large bowl if using a hand-mixer) and cream together until smooth. Add eggs, one at a time, fully incorporating each before adding the next. Make sure to scrape down the bowl in between each egg. Add heavy cream, vanilla, lemon juice, and alcohol and blend until smooth and creamy.

4. Pour batter into prepared crust and tap the pan on the counter a few times to bring all air bubbles to the surface. Place pan into a larger pan and pour boiling water into the larger pan until halfway up the side of the cheesecake pan. If cheesecake pan is not airtight, cover bottom securely with foil before adding water.

5. Bake 45 to 55 minutes, until it is almost done - this can be hard to judge, but you're looking for the cake to hold together, but still have a lot of jiggle to it in the center. You don't want it to be completely firm at this stage. Close the oven door, turn the heat off, and let rest in the cooling oven for one hour. This lets the cake finish cooking and cool down gently enough so that it won't crack on the top. After one hour, remove cheesecake from oven and lift carefully out of water bath. Let it finish cooling on the counter, and then cover and put in the fridge to chill. Once fully chilled, it is ready to serve.

Pan note: The creator of this recipe used to use a springform pan, but no matter how well she wrapped the thing in tin foil, water would always seep in and make the crust soggy. Now she uses one of those 1-use foil "casserole" shaped pans from the grocery store. They're 8 or 9 inches wide and really deep, and best of all, water-tight. When it comes time to serve, just cut the foil away.

Prep notes: While the actual making of this cheesecake is a minimal time commitment, it does need to bake for almost an hour, cool in the oven for an hour, and chill overnight before it is served. Please plan accordingly!

Some variations from the recipe creator:

** Lavender-scented cheesecake w/ blueberries - heat the cup of heavy cream in the microwave or a saucepan until hot but not boiling. Add 2 tbsp of lavender flowers and stir. Let lavender steep in the cream for about 10-15 minutes, then strain the flowers out. Add strained cream to cheesecake batter as normal. Top with fresh blueberries, or make a quick stovetop blueberry sauce (splash of orange juice, blueberries, a little bit of sugar, and a dash of cinnamon - cook until berries burst, then cool)

** Cafe au lait cheesecake with caramel - take 1/4 cup of the heavy cream and heat it in the microwave for a short amount of time until very hot. Add 1-2 tbsp. instant espresso or instant coffee; stir to dissolve. Add this to the remainder of cream and use as normal. Top cheesecake with homemade caramel sauce (I usually find one on the food network website - just make sure it has heavy cream in it. You can use store-bought in a pinch, but the flavor is just not the same since its usually just sugar and corn syrup with no dairy).

** Tropical – add about a half cup of chopped macadamias to the crust, then top the cake with a mango-raspberry-mandarin orange puree.

** Mexican Turtle - add a bar of melted dark chocolate (between 3 and 5 oz., to taste) to the batter, along with a teaspoon of cinnamon and a dash of cayenne pepper (about 1/8 tsp.). Top it with pecan halves and a homemade caramel sauce.

** Honey-cinnamon with port-pomegranate poached pears – replace 1/2 cup of the sugar with 1/2 cup of honey, add about a teaspoon or more (to taste) of cinnamon. Take 2 pears (any variety you like or whatever is in season), peeled and cored, and poach them in a boiling poaching liquid of port wine, pomegranate juice/seeds, a couple of "coins" of fresh ginger, a cinnamon stick, and about a 1/4 cup of sugar. Poach them until tender, then let cool. Strain the poaching liquid and simmer until reduced to a syrupy-glaze consistency, then cool. Thinly slice the cooled pears and fan them out atop the cooled cheesecake. Pour the cooled poaching syrup over the pears, then sprinkle the top with chopped walnuts and fresh pomegranate seeds.

Some variations from Jenny (from JennyBakes):

**Key lime - add zest from one lime to sugar before mixing with cream cheese. Substitute lemon juice, alcohol, and vanilla with key lime juice.

**Cheesecakelets - put in muffin tins, ramekins, or custard cups. Try baking 20-35 minutes, or until still a little jiggly, and cool as before.


Enjoy!
-Erica
Friday, April 24, 2009

Gooey Turtle Brownies

Chocolate. Caramel. Pecans. Brownies.

Need I really say more?

I love brownies. I love chocolate. I love caramel. I love nuts....any kind of nuts, just about. When you put them all together, it is a celebration.

Photobucket

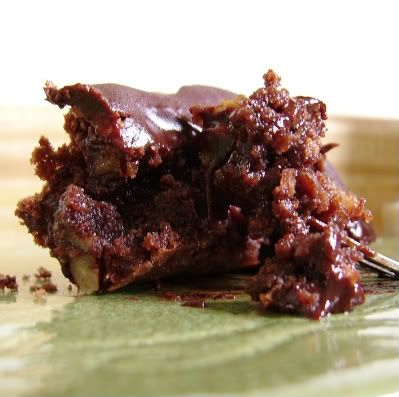
These brownies are not for the faint-hearted. These are chewy, gooey, rich, decadent, fudgy brownies. Mmmmmmm.

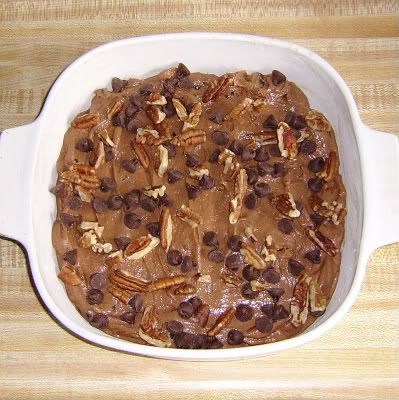
I started with a double chocolate brownie base with pecans. Two kinds of chocolate in there, my dear. Sprinkled with chocolate morsels and pecans.

Unbaked Brownies

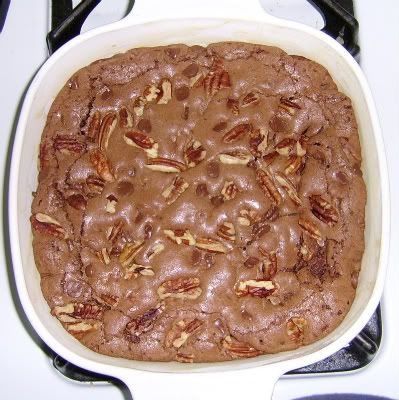
I baked them for about 40 minutes....they looked delightful straight out of the oven. I could barely keep my hands off of them!

Photobucket

Oh, but this is where it gets *really* good.

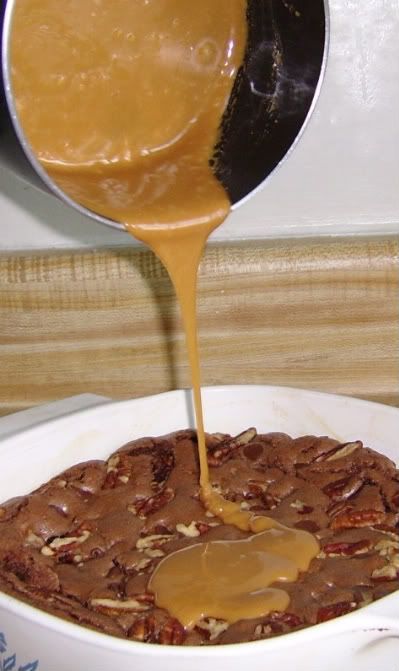
Photobucket
Bring on the CARAMEL! Lots of it!

After the caramel set, I smothered them in even more chocolately goodness. A rich chocolate ganache. Delightful.

I was so anxious, I didn't wait for them to cool all the way. I know, I know....shame on me. But, I'm willing to bet you would've done the same thing. Let's be honest. Yeah, I thought so.

Gooey Turtle Brownies

Double-Chocolate Brownies

2 oz. unsweetened chocolate
2 oz. semisweet chocolate
1 C butter, softened
2 C sugar
4 large eggs
1 C all-purpose flour
1/2 tsp salt
2 tsp vanilla
3/4 C chopped toasted pecans
3/4 C semisweet chocolate morsels

Preheat oven to 350 F. Microwave chocolate in a small bowl at MEDIUM for 30-second intervals until melted. Stir chocolate until smooth.

Beat butter and sugar at medium speed with an electric mixer until light and fluffy. Add eggs, 1 at a time, beating just until blended after each addition. Add melted chocolate, beating just until blended. Add flour and salt, beating at low speed just until blended.

Stir in vanilla, 1/2 C pecans, and 1/2 C chocolate morsels. Spread batter into a greased and floured 13 X 9 pan. Sprinkle with the remaining 1/4 C pecans and 1/4 C chocolate morsels.

Bake at 350 F for 40 minutes or until set. Cool completely on a wire rack. Cut into squares.

YIELD: 32 brownies

Note: Freeze brownies in an airtight container for up to 1 month.


After my brownies set, I poured the caramel and chocolate ganache over them.

For the caramel:
12 caramels, unwrapped
1 Tb heavy cream

Melt over low heat, stirring often, in a small saucepan. Pour over brownies.

For the ganache:
1/4 C semisweet chocolate
1 Tb heavy cream
1 tsp vanilla

Melt over low heat, stirring often, in a small saucepan. Pour over caramel.


Enjoy!
-Erica
Thursday, April 23, 2009

A Jar of Jelly Beans?

Thanks so much to everyone who entered into the Surprise Jelly Bean contest! It was a lot of fun to read everyone's comments. There are a couple flavors that I'd never even heard of....so I'll have to keep my eyes out for those.

For the booger-flavored beans....I *think* when I saw them they were in Fear Factor Jelly Bellys. Along with [dry heave] vomit, monkey farts, earwax, and many other disgusting flavors.

*deep breath*

Alright, so moving on......

Our fabulous winner is someone who obviously disagrees with 'buttered popcorn' flavored beans belonging in the "creepy flavors" category (and that's OK by me):

JBEAN WINNER!

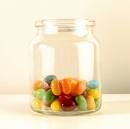
Congrats! Now, for the prize.....were you thinking you'd probably end up with this:
BEANS 1

....or even worse....this:
BEANS 2

Well, rest assured, my friend. Neither of those are your prize.

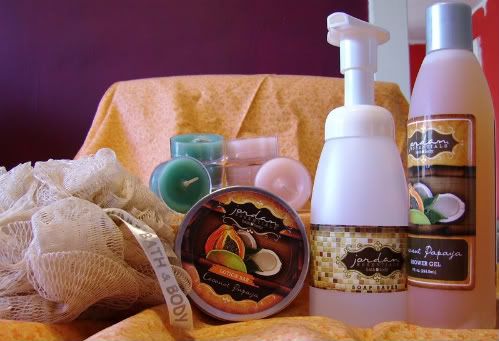
These glorious products are all yours:
Photobucket

To get you kick-started for Summer, you have:
Coconut Papaya Shower Gel with Soap Saver from Jordan Essentials
Coconut Papaya Lotion Bar from JE
Bath Scrunchie from JE
8 summer-scented tealights from PartyLite
Caramel Pecan Pie Mix (not pictured) from The Gourmet Cupboard

Once again, thanks to everyone who entered! If you haven't already, subscribe to my blog....there are plenty more giveaways coming in the next few weeks.

Enjoy!
-Erica

Wednesday, April 22, 2009

Know what I mean, Jelly Bean?

This is a cute little saying that my good friend Maggie says. I find it cute and whimsical....and totally appropriate for today.

That's right, did you know today is National Jelly Bean Day? Well, it is my friend. Glorious Jelly Beans. They have been around since the 1800's, and while no one knows the name of the person (probably a woman, by the way) that actually invented the Jelly Bean, we're sure glad *she* did it!

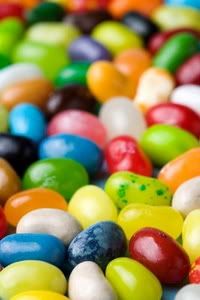
JBEAN CLOSE UP

You know how I love colorful things. So, naturally I am a Jelly Bean fan. However, I cannot seem to jump on the, what I have deemed, "creepy flavors" bandwagon. A Jelly Bean just shouldn't taste like buttered popcorn or boogers. I mean, really? I thought we, as a society, agreed that eating boogers is nasty, no? So why promote eating boogers IN public, WITH your friends, AND laughing while you do it?! I don't know, my friend, I don't know.

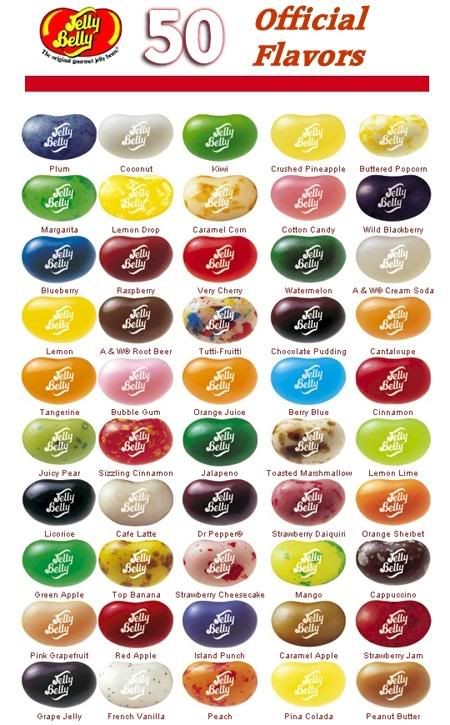
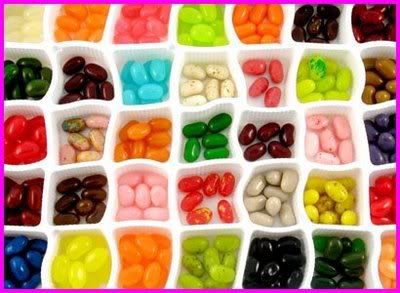
Alright, moving on. Jelly Beans have now been created in well over 50 distinct flavors and can be found almost anywhere. Here is Jelly Belly's chart of their "standard" flavors.

JBEAN CHART

Thank goodness the "booger" flavor isn't a standard, yeah?

*clears throat*

Sorry, I just cannot help but dwell on that. It really bothers me....boogers? Who would think of such a flavor?

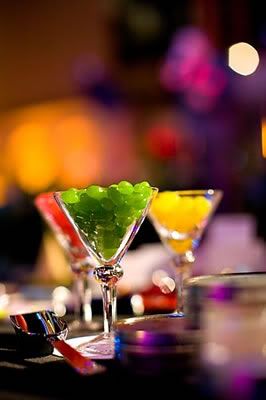
Ok, ok....so anyway, Jelly Beans have even been served at high-end parties. They're growing up, you know. These Jelly Beans are out having a great time. I hope they have a DD* to get them home safely.
JBEAN Cocktails

Did you know that there is even such a thing as a Jelly Bean Bar? Yes, indeed there is. It is OK if you didn't know, I didn't either. See, we're forming bonds, learning together.

JBEAN BAR

Yes, evidently, someone has spent a lot (and I do mean a LOT) of time eating Jelly Beans in different combinations and seeing what it tastes like. Everything, from desserts like Tiramisu to WINE. Yes, I said wine. I found this information on Isn't She Lovely.

So, in light of National Jelly Bean Day, would you like to do something else super fun? Yes? I thought you might.

Alright, here we go:

Leave a comment and tell me YOUR favorite Jelly Bean flavor. It can even be a "specialty" flavor that is not on the "standard" flavor list.

Comments will be accepted now through 5 PM Eastern on Thursday, April 23rd.

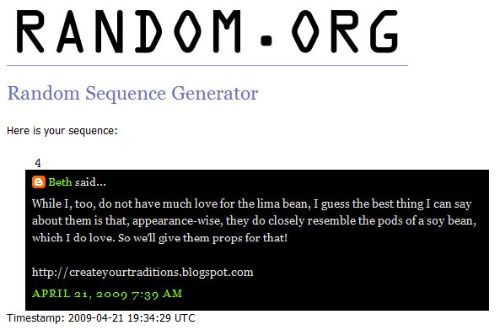
Then, I will go to RANDOM.org and we'll have ourselves a winner!

"A winner of what?", you might ask? Well, that part is a surprise! It is something yummy, something sweet, something special. You'll just have to comment to find out what it is!

[Please remember if you choose to leave an ANON comment to include your name and some sort of contact info]

*DD = Designated Driver (non-drinker) for those who didn't know.

Enjoy!
-Erica

Tuesday, April 21, 2009

LIMA WINNER!

Thanks so much to everyone who shared with me the wisdom of why I should respect Lima Beans. I feel enlightened....and maybe I'll toss some beautiful green Limas in my chili next time. Probably not, but who knows? Maybe I will.

Ok, I think we both know I won't, but it sounded nice, didn't it?

Alright, on to the winner of the beautiful Lima Bean Earrings and Bracelet set.

Lima WINNER

Beth! Thanks so much for sharing....and while she doesn't really care for Lima Beans, I bet she'll love these fancy pieces of jewelry!

Congratulations, Love!

Enjoy!
-Erica

PS) Keep your eyes peeled, I have more giveaways up my sleeve and coming your way!

Monday, April 20, 2009

Respect those Lima Beans!

So, according to this site on American Food Holidays, today is "Lima Bean Respect Day". Not exactly sure how often Lima Beans get disrespected, but evidently it is a lot, considering they now have a National Holiday in which they have demanded respect.

Personally, I don't really care for Lima Beans.

*Wait* Maybe I shouldn't say that ON "Lima Bean Respect Day". Is that horrible of me? I should be paying homage to Lima Beans? Today? Only today? Oh, OK, I guess that I can be nice to Lima Beans for one day.

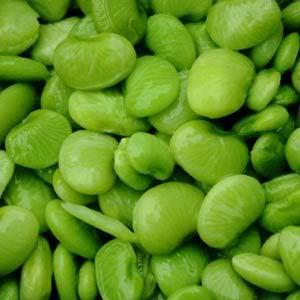
Here, this picture is kinda pretty:
LIMA BEAN

Don't you think? Well, green IS my favorite color....and these ARE a very nice shade of green. Ok, so maybe Lima Beans aren't *that* bad.

So, let's do something super fun, shall we?

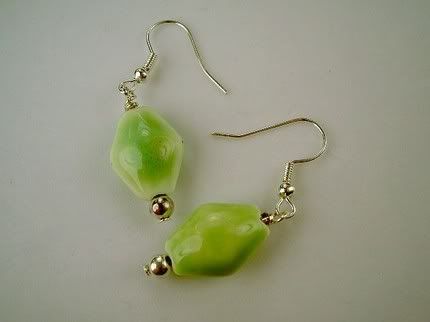
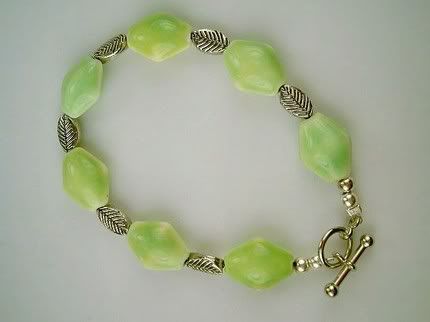
Look what I found on Etsy:

EARRINGS
LIMA BEAN EARRINGS

Photobucket
LIMA BEAN BRACELET

Are they not beautiful!? The color is fantastic!

Who would like to win these fabulous pieces of jewelry....handcrafted by Sassaffras....would YOU like to win them?

Well, you can! Here's how:

Post a COMMENT and tell me why YOU "respect" Lima Beans. Doesn't have to be anything fancy, can even be something great like, "Because they're green and that is my favorite color." (Then I'll say, "Me too!")

The winner will be chosen at random (by RANDOM.org). Comments will be accepted through 3 PM Eastern on Tuesday, April 21.

***Please be sure to leave your name and e-mail in the post if you're leaving an ANON comment. Thanks!***

Winner will be announced Tuesday evening!

Enjoy!
-Erica
Blueberry Crumbcake Pancakes

I was feeling a little frisky this morning and wanted to try something new. There was this recipe I came across on Joy the Baker's blog, Oatmeal Cookie Pancakes. They looked so delicious and we definitely share a love of pancakes.

So, I took Joy's recipe into the kitchen with me and got to mixing.

Here is the finished plate:
Photobucket

Delicious, no? YES!

From the blueberries, cinnamon, and brown sugar IN the batter.....all the way to that delightful crumb/streudel topping.....then drizzled with maple syrup.

Talk about Heaven. Mmmmmmm.

If you would like to try your hand at these, here ya go:

Blueberry Crumbcake Pancakes
(modified from Oatmeal Cookie Pancakes, Joy the Baker)

2 eggs
2 C buttermilk
4 Tbsp butter, melted
1/2 tsp vanilla extract
1 1/2 C all-purpose flour
1/2 C old fashioned oats
2 Tbsp brown sugar
2 tsp baking powder
1 tsp baking soda
1 tsp salt
1 tsp cinnamon
dash of nutmeg
1 C blueberries

(oil, butter, or cooking spray for the pan)

Step 1: In a large bowl, beat eggs. Add buttermilk, butter, and vanilla; mix well. Add flour, oats, sugar, baking powder, baking soda, spices, and salt. Mix well until mostly smooth. Fold in blueberries and let batter set for a few minutes.

Step 2: Heat griddle or pan over medium heat. Add a tsp of oil or butter to pan (or spray with cooking spray). You can test to see if the pan is hot enough by adding a few drops of water, when the water drops start to dance, its hot enough.

Step 3: Pour 2 Tbsp of batter onto the griddle. Cook on the first side until bubbles that form start to pop. You can also gently lift up the pancake to make sure the bottom is not overcooking, if it is the pan may be too hot and you will need to adjust the heat. Flip the pancake over with a spatula and cook until golden brown. Repeat until all the batter is gone. Let cooked pancakes rest on a heat proof plate in a 200 degree F over until ready to serve.

Step 4: Serve pancakes in stacks with a dollop of butter, drizzled with maple syrup, and topped with streudel crumbs.


Streudel Crumbs

1/4 C oats
1/2 tsp cinnamon
dash of nutmeg
1 Tbsp brown sugar (packed)
1 1/2 Tbsp butter or margarine, softened

Mix ingredients together with a fork until it resembles coarse crumbs.
Sprinkle on top of your pancakes.

*You can adjust the quantity of any ingredient to suit your personal tastes.

Photobucket

Enjoy!
-Erica

Sunday, April 19, 2009

Sunday Spotlight: Omnomicon

I come to you today extremely excited....nope, just flat out beside myself with enthusiasm. Really. People who know me would tell you that I am a very colorful person. I love everything colorful. Everything. Green especially. Lime green, if we're getting technical....anyway....I can be seen almost anywhere carrying my obnoxiously large, bright, lime-green Laffy Taffy bag (it is so adorable and I got it for a STEAL). I rarely have ever been described as "normal"...and that is quite alright by me. *smile*

Photobucket

Ok, so moving on.....I was browsing the internet, looking for a blog to highlight today, when I found this site called Tastespotting. I was awe-stricken. A place that I can just look at all kinds of glorious food! Well, I came across this beautiful piece of cake, Daffodil Cake. I thought to myself, "I'd love to try that cake!" Then I proceeded to peruse the blog that it came from. I love this girl! She is hilarious, I cannot tell you the number of times that I actually laughed out loud and said, "Me too!".

Now, I have decided that I'm definitely doing the Sunday Spotlight on her....but to find a few other things that I'd like to try. Well, that did not take long, let me tell you! She had the most beautiful cake I have ever seen on there...and I stopped dead in my tracks (Ok, well I was sitting....but you know what I mean!). I walked through the recipe and knew I had every ingredient on-hand. That was it!

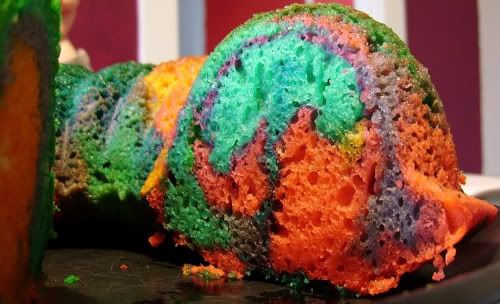
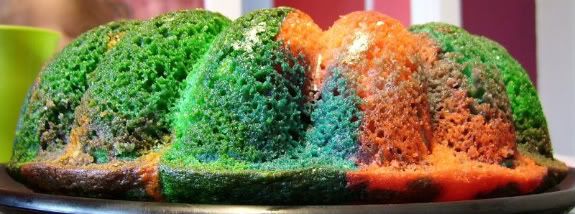
I give you.....RAINBOW CAKE:

Photobucket

Beautiful, isn't it?

Don't worry, I have PLENTY of other shots of it that I WILL be sharing, so you'll get to see lots more of it's wonder! *smile*

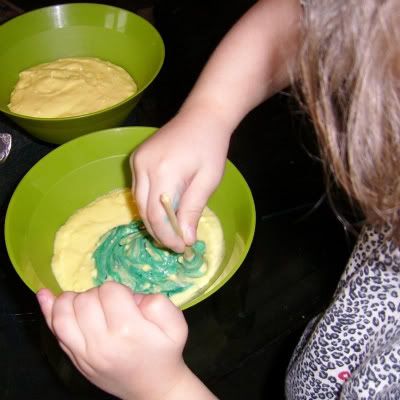
My daughter, Syndel, walked in right as I was printing the recipe out and said, "Oh, Mommy! Can I help you make that pretty cake?" How was I going to turn down a girl who obviously loves color (and baking) as much as me? Well, I couldn't.

So, Syndel and I got to mixing:
Photobucket

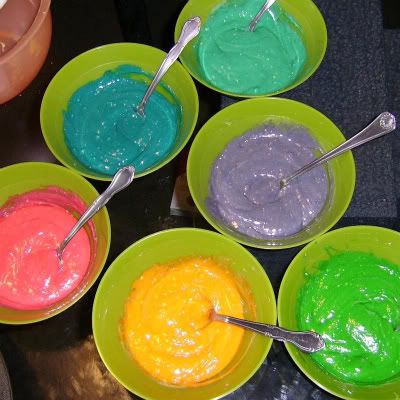
She thought that part was fun, but this is what really got her pumping:
Photobucket

Photobucket

All those glorious colors.....just beautiful!
Photobucket

Now, I know, I know....we didn't have the "real" rainbow colors, so we just made do with what we did have.....6 gorgeous colors....just not all found in the "traditional" rainbow. And that is OK by both of us....I checked.

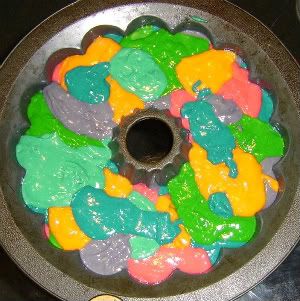
So, we didn't really care about the layering effect, we just wanted something pretty....so we just did spoonfuls of the different colors into the bundt pan:
Photobucket

Syndel sat at the oven door for most of the time it was baking. She kept turning the light on to check on it and such. So cute....and reminds me a lot of when I was young. I've always had a passion for everything in the kitchen....baking, cooking....anything.

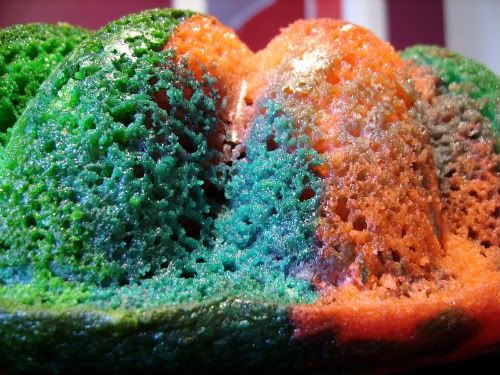
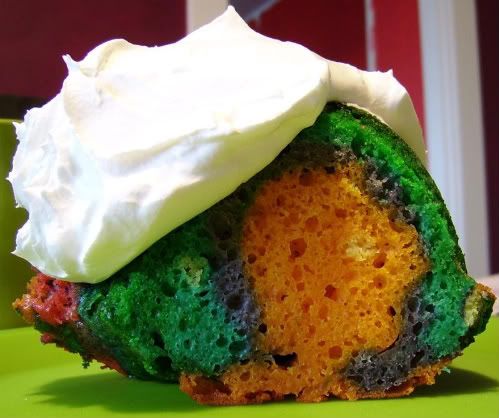
When it came out, we both "oooohed and aaaahed" over it. Phenominal! I tell you....really. Look closely......beautiful, yeah?

Photobucket

So, naturally, we were even more excited to cut into that baby! Syndel and I hovered over the cake, we could already picture the beauty that we were about to witness in our little minds......

Photobucket

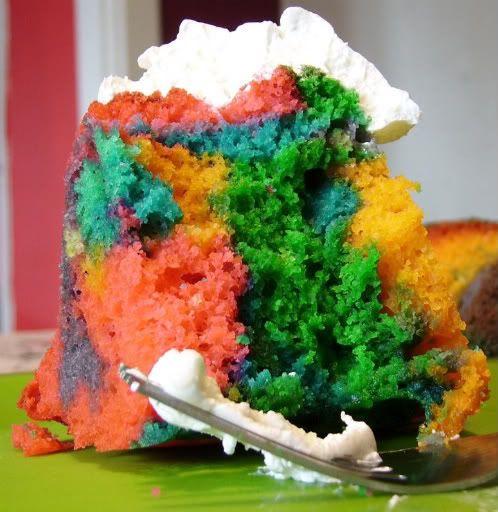
Syndel squealed with delight....I held mine back just slightly and gasped. *giggle*giggle* Really, I have never seen such a beautiful cake! Have you? Really now, let's be honest!

Photobucket

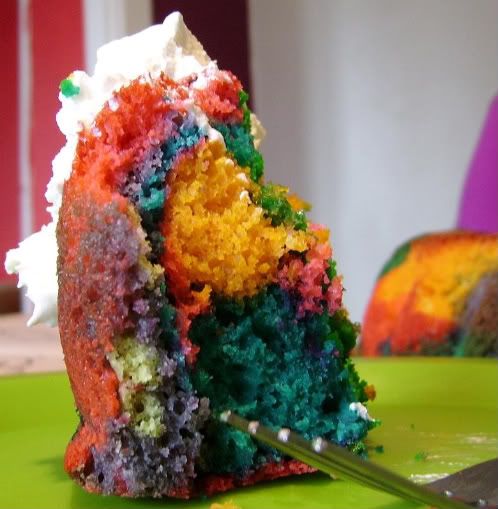
I was so moved by it, I almost didn't want to eat it.....almost. But now I needed to know if it tasted as wonderful as it looked.

Photobucket
.....and it did!

Photobucket

I couldn't help but take a ton of pictures of it. Everytime I took another bite, I smiled, excitedly, because I thought it was even more pretty than before!

Photobucket

Fabulous!

Ok, so for the complete recipe for this darling.....go here and visit Omnomicon. I think she is pretty great and you probably will too.

Enjoy!
-Erica

Saturday, April 18, 2009

Berry Lemonade Cupcakes

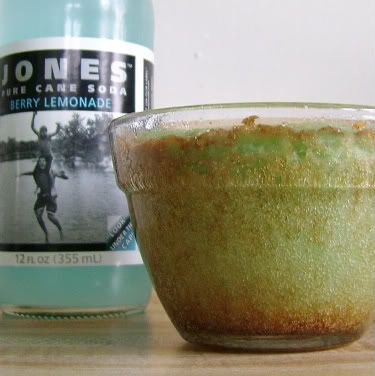
Alright, so here is the other cuppie that I created with that Jones Soda.

Photobucket

I used the same recipes for the cuppie, icing, and filling...but omited the glaze on top. The flavor of this one was so good, I didn't think it needed the glaze.

Photobucket

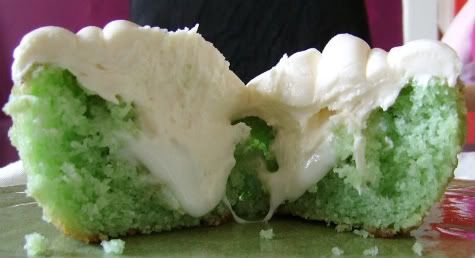
Wanna see what is inside? Here ya go:
Photobucket

Now, for the filling on this cuppie, I added a splash of the soda pop, so it isn't as thick and firm as the other filling, but I loved it!

Thanks again to Play at Home Mama, Gonna Go Walk the Dogs, and Put a Cupcake In It for the recipes I used to create these delights.

Check out IronCupcake for more cool cupcake stuff.
Our April ETSY PRIZE-PACK is from artists:
A creation by FRUITFLYPIE, a pair of cupcake earrings from LOTS OF SPRINKLES, a sweet surprise from Sweet Cuppin' Cakes Cupcakery,
PLUS, IronCupcake:Earth can not forget our good friend, CAKESPY, who is now going to be doing a piece for our winner each month until further notice - sweet!

Last and certainly not least, don’t forget our corporate prize providers: HEAD CHEFS by FIESTA PRODUCTS, HELLO CUPCAKE by Karen Tack and Alan Richardson, JESSIE STEELE APRONS ; TASTE OF HOME books, a t-shirt from UPWITHCUPCAKES.COM. Iron Cupcake:Earth is sponsored in part by 1-800-Flowers.

Enjoy!
-Erica